Step 1: Choose the Right Velvet Fabric
Velvet curtains come in different weights and compositions. For a living room, you want a fabric that drapes beautifully and provides enough insulation. Opt for heavy-weight velvet with a high thread count for durability. Consider the pile direction; a consistent nap gives a uniform sheen.
Tip: Touch the fabric in person if possible. A good velvet should feel soft but substantial.
Warning: Avoid cheap poly-blend velvets that crush easily and attract dust.

Step 2: Measure Your Windows Accurately
Proper measurements are crucial for a polished look. Use a steel tape measure for precision.
Measure the width from left to right at the top, middle, and bottom of the window. For fullness, multiply the width by 2 to 2.5 times for velvet curtains. For length, decide whether you want the curtains to just touch the floor, hover 1/2 inch above, or puddle an inch or two.
Tip: Always measure twice and account for the curtain rod placement (usually 4-6 inches above the window frame).
Warning: Velvet shrinks if washed, so order slightly longer if planning to clean.

Step 3: Select the Curtain Rod and Hardware
Velvet is heavy, so standard tension rods or lightweight rods are insufficient. Choose a sturdy metal or wood rod at least 1.5 inches in diameter. Use wall brackets spaced no more than 24 inches apart and anchored into studs or with heavy-duty toggle bolts.
Tip: Consider a decorative finial that complements your room’s style – brushed brass for glam, matte black for modern.
Warning: Never use adhesive hooks; they cannot support velvet’s weight.
Step 4: Decide on Curtain Length and Fullness
The length changes the room’s feel. Floor-length (1/2 inch above floor) is most common for a clean look. Puddling (2-4 inches extra) adds drama but requires more fabric and upkeep. For fullness, use panels that are twice the window width.
Tip: If you have baseboard heaters, hem curtains 1-2 inches above to avoid fire hazard.
Warning: Too much puddling can make a small room feel cluttered.
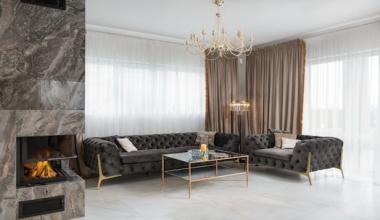
Step 5: Pick a Color That Complements Your Decor
Velvet offers rich hues that can define the living room. Darker colors like navy, emerald, or burgundy create a cozy, formal ambiance. Light tones like blush, dusty blue, or cream open up the space. Coordinate with your existing palette using the 60-30-10 rule (60% wall, 30% curtains, 10% accents).
Tip: Use a color wheel – complementary colors (e.g., blue velvet with orange accents) make a statement.
Warning: Avoid highly saturated colors that may fade quickly in direct sunlight.
Step 6: Consider Lining Options
Most velvet curtains benefit from a lining. Choose blackout lining for complete light control and thermal insulation – ideal for media rooms. Sheer lining softens the light while still protecting the velvet. Acoustic lining is perfect if your living room has hard surfaces that cause echo.
Tip: A lining also reduces friction on the rod, helping the curtains slide easily.
Warning: Unlined velvet may become brittle in sunlight, so always line it.
Step 7: Install the Curtains Properly
Hang the rod as high as possible – close to the ceiling – to make the ceiling appear taller. Extend the rod beyond the window frame by at least 6-8 inches on each side so the curtain doesn’t block the glass when open. Use rings or back tabs for a tailored look; pinch pleats are a classic choice for velvet.
Tip: If using grommets, ensure the inner diameter is large enough (min 2 inches) for the rod.
Warning: Never hang velvet curtains too close to a radiator or fire source.
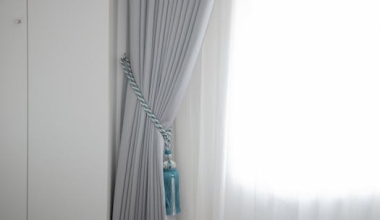
Step 8: Style with Layering and Accessories
Layer velvet curtains with sheer panels for daytime privacy, or pair with a valance to hide the rod. Use decorative tiebacks to hold curtains open – tassels or magnetic tiebacks work well. Add curtain weights in the hem for a straight drop.
Tip: For a luxurious feel, use two sets of curtains: a blackout velvet set and a sheer set on a separate rod.
Warning: Avoid overly bulky tiebacks that can crush the velvet pile.
Step 9: Care and Maintenance
Velvet is delicate. Vacuum gently with a brush attachment weekly to remove dust. Spot clean spills immediately with a damp cloth – never rub. Professional dry cleaning is recommended once or twice a year. Steam from a distance to remove wrinkles; never iron directly.
Tip: Rotate the curtain panels occasionally to ensure even sun exposure.
Warning: Never use bleach or harsh chemicals; they can permanently discolor the fabric.
Step 10: Common Mistakes to Avoid
| Mistake | Why It’s a Problem | Best Practice |
|---|---|---|
| Using lightweight rods | Can’t support velvet; may bend or fall | Use heavy-duty rods with multiple brackets |
| Skipping the lining | Fabric degrades quickly in sunlight; less insulation | Always add blackout or thermal lining |
| Choosing the wrong length | Looks awkward or hazardous | Measure and follow the 1/2 inch clearance rule |
| Overlooking fabric quality | Cheap velvet pills and loses luster | Invest in a high-quality, dense velvet |
By following these steps, you can transform your living room with stunning velvet curtains that add warmth, texture, and elegance. Start with the right fabric, measure carefully, and customize the hang for a professional finish. Your living room will feel like a designer showpiece.